Welcome to an 1864 farmhouse…life is good!


Showing posts sorted by relevance for query mae. Sort by date Show all posts

Wednesday, April 29, 2020

a vintage stove named Mae...


It's a cloudy Wednesday here on the farm...the kind of day that's good for old movies, favorite books, and an afternoon nap. My son will say this is his favorite kind of day, and I absolutely agree. It just seems like we take things a bit slower and enjoy them more.

So today's post is to introduce you to Mae...a 1950  Hotpoint stove. And I'm guessing you're probably thinking two things:

1- Who names their stove?

2- Sure vintage is cute, but is she practical, can she cook?


So, here's a little story of a stove named Mae.

A month ago, while going through a baking frenzy (who isn't these days?) and right in the middle of the kids' favorite Charlie Brownies, I noticed the heating element in our oven looked like a sparkler and a hot glow was traveling around the element. I turned the oven off. The traveling glow and sparks continued. So off went the breaker and I unplugged the stove. It stopped, and the oven stayed hot enough to finish baking the Charlie Brownies...a high priority. 

Now, I'd be less than honest if I didn't say that a little part of my heart skipped for joy...I've been wanting a double oven for some time now. If I'm going to be baking for my little farm market, two ovens are definitely better than one. So I began researching double ovens: which ones were rated the best and were any of those in stock locally? 

Then I had a brainstorm, being a devoted Susan Branch fan (read her blog...it's LOVELY) I began thinking, what about a vintage double oven?  Hmmm, I remembered she has one she loves, so I went back to her post about it...a 1956 O'Keefe and Merritt, "still going after almost sixty years in service."

And so I hopped online and began searching within a 50 mile radius. In no time at all I came across a 1950 Hotpoint for sale in "working condition" right here in my hometown. Come on, what are the chances?

Yep, she was cute, but that isn't enough...the bottom line would be, did she work?  So I decided to drop Susan Branch a note asking about her vintage oven, and she was kind enough to reply, even suggesting a shop that carried replacement parts if I would ever need them.

Okay...it's less than 15 minutes away, how can I not go? I set up a time to stop by and take a look. The kind family I talked with were the new owners of the house, and so an inspector had just given the oven a once-over...it all worked. At 39-inches wide she would just barely fit in my kitchen, but it didn't matter...she was coming home with me. Before we left, the homeowner asked me if I canned...I had a feeling she was hoping the stove was going to a good home. Yes, I told her...before I know it we'll be making jams, jellies, and canned tomato sauce.

Between the brawn of both my husband and son, she was up the steps, through the mudroom, and in place in no time at all.


I LOVE THIS STOVE. Two ovens, two broilers, and four burners that have in the last month baked endless batches of cookies, brownies, bread, along with Easter dinner and any other meal we could think of.


I LOVE how she's a pushbutton and the buttons change colors depending on the temperature...they're called "Talking Buttons"

.


Evidently she was quite the rage when these advertisements debuted!


  Amazon.com: Hotpoint Pushbutton Cooking Stove Kitchen 1950 Vintage Antique Advertisement: Prints: Posters & Prints


I LOVE that she has really deep pull out drawers that fit my extra pots, pans, and tea kettles. This is something that new double ovens don't have.


I LOVE that the repairman who just worked on our dryer took a look at her and said, "They don't make 'em like that anymore," and assured me he knew of a source for parts and that he could make repairs if I needed them. 

And her name? Well, my friend Lisa said anything vintage needs a name. And she's right, we named our camper, why not name a stove? I settled in and tried to get creative. Our camper is named Maizy, a name that's special because it's what my grandmother always called me...hmmm, her middle name was Mae. Why not Mae? 

I also needed a name for my little farm market, how about Maizy & Mae?  It felt like the perfect combination of my baking done in our vintage oven.


And so there you are...the story of Mae. A stove that is not only sweet to look at, but yes, so practical. And when I cook with her, I can't help but think that she's been bringing families together for 70 years...a very long time indeed. 


Sunday, December 11, 2022

baking with Mae...

When the December sky is a gun-barrel gray and any warmth from the sunshine is lost behind the thick clouds and blown away by the brisk winds, there is always something that I know will bring me warmth...baking in the farmhouse kitchen. 

Built 158 years ago, I often think back to the many women who prepared meals in this old farmhouse, and as someone who loves history, it's been fun over the years to cook in the kitchen fireplace...an antique tin kitchen/reflector oven makes the best roast turkey! 

But this past week, it was Mae and I who did the baking. Just for fun, I've named some of my vintage items...the little 1963 Camper is Maizy, my road-side find 1956 sewing machine is Fern, and Mae is my 1950 Hotpoint stove. Mae is a big 40-inch-wide workhorse...if you'd like, you can read the story of how she came to the farm here.  With 2 ovens she can bake double what I could before - she's a gem!

Pies were needed for a church get-together, and then I thought I'd try a couple of recipes from my blogging friends.

Staci at Life at Cobble Hill Farm, was kind enough to share her recipe for cranberry-orange biscotti - I've never made biscotti before, but I love the combination of cranberries & orange...it was wonderful!

Not nearly as pretty as Staci's - I need to work on my rolling/cutting skills, but they were oh-so delicious!


Then I wanted to make the sticky ginger cake from Jules at Along the WayExcited to try her recipe, I dusted off my food scale and I was meticulous in converting grams to cups.

However...my apologies Jules. I didn't choose the correct pan size, so I had an overflowing, not-so-pretty loaf. Well, to try and save the day, I used my cookie dough scoop and made sticky ginger balls. Again, not the exact recipe from Jules, but the flavor was amazing and it's a recipe I'll make again (with a larger pan!)


This coming week will find my son home from college for Christmas break...he has a couple more exams and my daughter just completed hers - and so the holidays begin!

In a drafty old country farmhouse on a cold December evening, it's time for me to settle in on this Sunday evening...a cozy blanket, a mug of cocoa, and our local PBS station is showing 3 back-to-back episodes of All Creatures Great and Small...heaven for me!

I'll say goodbye with a photos of Santa on the blue barn shelves and some of my favorite ornaments on the little old-fashioned tree.


...have a good week, friends!


Thursday, March 03, 2022

old-school recipes...worth revisiting!


"Old School"

...the values of an earlier generation, retaining something good, others have lost.

That's the definition I've found makes the most sense to me...old-fashioned values, passing down traditions & recipes, sharing the stories behind sweet family photos before they're forgotten. Holding on to things that seem to be at a loss in these "hurry up" times.

In a world that seems to spin faster every day, I'm making an effort to slow down that pace a bit by dusting off some handed down recipes that have been tucked away for far too long. 

Once-upon-a-time, I was a Cookbook Editor, what a fun job with the best people! We spent time researching recipes, testing recipes, and of course eating the fruits of our labor. Because of that job, I collected several old cookbooks found on country store shelves and in small town bookstores. You know the kind...cookbooks that "needed a home." 


This one is completely handwritten; wish I knew the year...


a 1959 Farm Journal Country Cookbook...


Good Neighbor recipes from 1952...


I have exactly 5 handwritten recipes from my grandmother
(everyone called her Mom)...


and while sorting through my my mother-in-law's garage after she passed away,
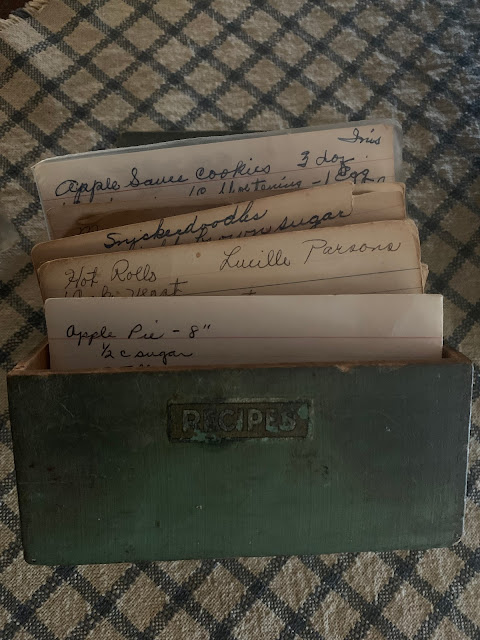
I discovered an old recipe box filled with dozens of handwritten recipes...


While it's fun to try new recipes, I think you can never beat a time-tested classic, so I've decided to share these old recipes. I'll show you the original recipe, let you know how it turned out, along with any changes I might make the next time I prepare it. Some of the handwriting and ingredients are faded and hard to read, but I'll do my best!


Maizy is what my grandmother always called me, and Mae is the name I've given my 1950 Hotpoint stove (Mae was my grandmother's middle name). So together we'll be working our way through the vintage recipes I have on hand.

And so, with that long introduction, next week you'll find a retro recipe worth revisiting! We've already tested Chocolate Chip Cookies, Pasta Sauce & Meatballs, and Bread & Butter Pickles. Next on the list...I'm thinking the Perfect Fried Chicken from 1959 would be great this weekend!


PS...

if you've been reading here awhile and wonder how we weathered the lack of propane and heat for 3 weeks in February, you can read all about it here

Settle in and put your feet up, it's a long read!


Thursday, September 17, 2020

canned banana peppers...handed-down, tried & true


The last few days I have been in a tizzy. Webster's Dictionary is spot on when it says a tizzy is: 

"a highly excited and distracted state of mind"


Yep, that about sums it up. 

In a frenzy.

In a panic.

Riddled with guilt.


And why? Because with canning season here and the garden overflowing, I couldn't find my grandmother's recipe for pickled banana peppers...it wasn't in the spot it's "always" in. Anxiousness set in...this was her handwritten recipe, what could I have done with it? The last time I made it was for our County Fair, but I was sure I didn't take it with me to the fairgrounds.

I looked through my cookbooks...had I tucked it away? I looked through kitchen drawers...was it with other loose recipes? I called my mom...she tried to recall it from memory, but wasn't sure, and she didn't have a copy.

Feeling defeated, I decided I had to go through cookbooks again, this time not looking for the recipe card, but looking at cookbooks I had helped write. Once upon a time I was a Cookbook Editor, and surely somewhere in those dozens of books I had written, I had included her recipe. 

I sat on the floor, and began all over again. Finally I pulled my very first cookbook off the shelf, and there it was: Maymie's Canned Peppers. I was thrilled...while I still need to find that heartfelt, original recipe, I at least HAD the recipe. And so today, the canning began!

I'll share it with you, but remember, this is an old recipe...probably 80 years-old if not older. I don't claim to be an expert at perfecting the pickling salt/water/vinegar ratios, I just know that this recipe has been enjoyed for generations and it has worked just fine.

You'll also see she listed just brine ingredients. Today I picked as many peppers as I could, doubled the brine, and had some left over. I can't give you an exact count or weight of peppers...for me, that's the beauty of this old-fashioned recipe.


My grandparents in 1918


Maymie's Canned Peppers


Banana Peppers; hot or sweet

1 cup pickling and canning salt

9 cups water

1 cup distilled white vinegar

1 garlic clove, peeled, per jar

1 Tablespoon Wesson Oil, per jar


Prepare peppers...if leaving whole, cut two slits in each pepper, or you can slice peppers into rings discarding the stems. 

Prepare a boiling water bath and sterilize jars, lids and rings. If you have never done this before, please read the step-by-step instructions shared by the National Center for Home Food Preservation by linking HERE.

To create the brine, combine salt, water, and vinegar in a stockpot; bring to a boil. Reduce heat, stir, and simmer until salt is dissolved. Set aside, but keep to a low simmer.

Add one garlic clove to the bottom of each sterilized jar; then pack peppers tightly into jars. Slowly pour hot brine over peppers leaving 1/2-inch headspace. Add Wesson oil to each jar.

Use a small non-metallic spatula or plastic knife inside the jar between the peppers and the side of the jar to remove air bubbles. Wipe jar rims, apply lids and rings.

Process in a boiling water bath for 10 minutes. 


When I first went to look at Mae, my 1950 Hotpoint stove, the lady selling her asked if I canned...I'll be happy to tell her that today Mae and I canned for the first time and tomorrow we'll be canning tomatoes.

If you try them, I hope you enjoy these banana peppers...salty, with a hint of garlic and oil.  I'm oh-so grateful to have jars lining my pantry again! 


Wednesday, March 16, 2022

throwback Thursday...chocolate chip cookies!


It's time for my first Throwback Thursday recipe...and it just had to be about chocolate! 

This recipe was one of many handwritten cards tucked into a little green recipe box I found in my mother-in-law's garage. It's not her handwriting, so I'll never know if it was given by a neighbor, friend, or sister.  

Whoever it was that shared the recipe, had, in our opinion, a winner...and we're pretty picky when it comes to chocolate chip cookies!  I've made this recipe several times - they're easy to mix up and ready to enjoy before you know it.  

Because I want Throwback Thursday posts to be true to the original old recipe, I'm sharing ingredient measurements, baking times and temperatures just as they were written.  

Any simple changes I made for the sake of clarification, for example listing baking soda instead of simply soda, aren't noted.

However, any changes I made after my initial testing, are noted with an asterisk and an explanation as to why. 


Chocolate Chip Cookies

2-1/4 c. all-purpose flour
1/4 c. quick cooking oats
1 tsp. baking soda
1/2 t. salt
1 c. butter, softened (no substitutes)
3/4 c. sugar
1 c. brown sugar, firmly packed
2 large eggs
2 tsp. vanilla extract
2 c. semi-sweet chocolate chips
2 c. chopped walnuts*

Heat oven to 375* degrees.

Sift together flour, oats, baking soda, and salt. Set aside. Cream together butter and sugars; about 2 minutes. Add eggs, one at a time; blend well. Stir in vanilla. Add flour mixture; combine well. Stir in chocolate chips and nuts. 

Drop dough by rounded tablespoonfuls, about 2 inches apart, onto an ungreased baking sheet. Bake for 13* minutes, or until golden. Let stand on baking sheet 2 minutes, then transfer to a wire rack or plate to cool completely. Makes approximately 3-4 dozen. 


*walnuts - 
I substituted pecan chips purely for personal preference

*375 degrees - 
Mae tends to bake on the warm side...I reduced the temperature to 350 degrees

*13 minutes -
because Mae bakes a little warmer, I reduced the baking time to 9-11 minutes


My end result...I hope you like them!


Thursday, December 23, 2021

here comes Christmas!

Today a cold, steady wind from the north has been whistling around the old farmhouse, meaning outdoor chores are done quickly! The heat lamp was on last night for the girls and their beau in the coop, and goats were tucked in with an extra portion of hay and some apple slices...after all, everyone needs a little treat.

I've been baking cookies, sending out cards, and making secret shopping trips to gather stocking stuffers. Tomorrow we'll have snacks and appetizers to enjoy all afternoon, then at night we'll take our annual Christmas walk around the town square and past the shop windows. It's always fun to see the small town lights and decorations...we've been doing this for about 15 years and it just wouldn't be Christmas without it. 

If you've been reading here for awhile, you know I love old things...old houses, homespun traditions, simpler ways, and I've wondered how Christmases past were spent in 1864, when this old house was built. How did they stay warm when those frosty winter winds blew across the open fields? Burning wood and coal were the most common ways to heat a house back then...hmmm, so why am I bringing this up?

Could there be any worse time than the week of Christmas for a furnace to break? And while we wait for the parts to arrive, we're getting a small taste of an old-fashioned 1864 winter. Oh-so grateful for plenty of firewood as well as modern conveniences such as space heaters and kerosene heat. The kitchen has drawn us together like a magnet...heat from Mae, our stove, along with mugs of hot chocolate, plates of warm cookies, and a crackling fire.  (Now I know why ladies of the time wore numerous layers of clothing!)

Oh, we'll be just fine...Christmas morning we'll have cinnamon rolls, monkey bread, open gifts, and enjoy the day. Sunday the little ones I teach at church will sing "Away in a Manger" and my son is giving a talk about Christmas...a sweet way to enjoy the holiday.

From our house to yours, wishing a merry and blessed holiday season to you all!


Thursday, September 09, 2021

favorite country things...

The wind is picking up and blowing across the fields surrounding the old farmhouse. Even though the weather is still warm, I can see it...that unmistakable glint of gold, you know it: a coppery glow that comes just before the sun sets. I can hear it...the rustling of drying field corn as the towering 8-foot tall stalks sway back and forth bumping into one another. The seasons are changing, and it's time to stack wood, put the garden to bed, and do all that needs "doing" before winter arrives. There's a cozy feeling that comes from knowing "all is well" before the snow flies and the temperatures drop.


However; before that snow flies, there's still much to do...and these cooler, breezy days with no humidity are perfect for trying to check off as many jobs as possible on my (seemingly endless) to-do list. 

And because I know wherever you are, your days are full, this post is short on words and instead filled with snapshots of our days on the farm.

Savor it all friends, the winding down of summer and preparing for autumn...gathering, harvesting, putting-by. Ahhh, the lingering days of summer's pleasures.   


Oh this one? Nah, it's not on the farm.
But wouldn't it be great pulling Maizy?
 A 1953 Packard...
sigh.
I think I'd name her Lilly-Mae or Ida-Belle.

Must. Have. Vintage. Car.
or 
Truck...I'm not picky!


Thursday, May 05, 2022

throwback Thursday...double chocolate chip cookies

May here is always busy...yardwork, planning for gardens, end-of-school ceremonies & concerts, and spring cleaning. 

This year we'll celebrate two graduations...my daughter will be getting her university diploma for dance/ballet Saturday. She's dancing with a ballet company while finishing up her Psychology degree and will graduate with that next spring. My son will be graduating from high school in 17 days, and just committed to a college where he'll major in Biochemistry.

More about all this later...but honestly, how did we go from 

this,


to this?


Proud and excited as each of them chase their dreams! 

(and of course, a bit weepy...time flies, sniff, sniff)


Anyway...today's recipe came from my mother-in-law's recipe box and is another chocolaty one (do you see a pattern here?) I finished baking them just as my friend arrived with 9 glorious gallons of fresh, raw milk.

Just look at the cream floating on the top waiting for the best homemade butter and cheese...ahhh, what a treat!


Double Chocolate Chocolate Chip Cookies


1-1/4 c. butter, softened

2 c. sugar

2 eggs

2 t. vanilla extract

2 c. all-purpose flour

3/4 c. unsweetened cocoa powder

1 t. baking soda

1/2 t. salt

2 c. chocolate chips


Heat oven to 350 degrees. Cream together butter and sugar; add eggs and vanilla. Beat until combined. Gradually blend in flour, cocoa powder, baking soda, and salt. Stir in chocolate chips. Drop by teaspoonfuls onto an ungreased* cookie sheet. Bake 8 to 9* minutes. Cool slightly.


*While I didn't make any ingredient changes, I did put a parchment sheet on my baking sheet, and Mae needed a full 10 minutes for the cookies to bake, but then, each oven is a little different.

I don't think this is the best photo...but truly, if you have a chocolate craving, these are for you!


Wednesday, April 06, 2022

throwback Thursday...bread & butter pickles

Maybe it's just me, but I think Mother Nature is enjoying a little April Foolery. 

Hmmm, do you see any funny business going on?


snow...


rain...


ice...


While I like to think of April as a rather flowery, showery month, so far, it's been a whirlwind of anything goes. Oh well, I have plenty to keep me out of trouble inside, no need to worry about what needs doing outside...that time will come soon enough.

I've been working on a shelf I brought in from the barn...I'd say built in the 1950's, a little worse for the wear, but I just felt that it needed a home indoors. I've gently brushed out oodles of dirt & dust, wiped it down, and added a light protective coat of beeswax. When it's "just right" I'll share some pictures. For now, I'm still tinkering, as the saying goes. Speaking of "tinkering" just for fun I looked up a definition...this made me laugh:


"To attempt to repair or improve something 
in a casual or desultory way,
often to no useful effect."


"...no useful effect." Hmmm, well some may agree, the jury is still out on that!


Today's Throwback Thursday...
the recipe for my grandmother's
Bread & Butter Pickles. I've had this recipe for ages, so last summer I decided it was time to make them.

I'm so glad I did...they tasted just like I remember my grandmother's pickles tasting. I lived with my grandmother until I was 10, and while I was making these pickles, I loved knowing it was her handed-down recipe in her own handwriting.

Now a word of caution: if you've never used a water bath canner or prepared foods for pickling, read all that you can (I'll provide some links below) before you begin. It's of the utmost importance that care be taken to ensure preserved food is completely safe.

NOTE: This recipe is shared exactly as it was written decades ago; however I've given notes below it: some are changes I made for personal preference, the remainder are specifics I use for safe water bath canning.


Maymie Mae's Bread & Butter Pickles

4 qts. cucumbers, thinly sliced, ends discarded*
6 white onions, thinly sliced
2 green peppers, seeded and thinly sliced
3 cloves garlic, peeled
1/3 c. coarse medium salt*
5  c . sugar
1-1/2 t. turmeric
1-1/2 t. celery seed
3 T. mustard seed
3 c. cider vinegar

In a very large bowl, combine cucumbers, onions, peppers and whole garlic cloves. Add salt and mix with ingredients; cover with cracked ice. Let stand 3 hours; drain thoroughly.

Combine remaining ingredients and pour over cucumber mixture. Heat to a boil. Seal in hot sterilized jars.**


* 4 qts. cucumbers, thinly sliced

you'll need about 2 lbs. per quart, so depending on the size of your pickling cucumbers (about 4-inches on average) you may need 8-10 lbs.

 * 1/3 c. coarse  medium salt
I used pickling salt


** at this point I give more clarification as to what steps I took, but it's still important to review the links below for detailed instructions on preserving foods.


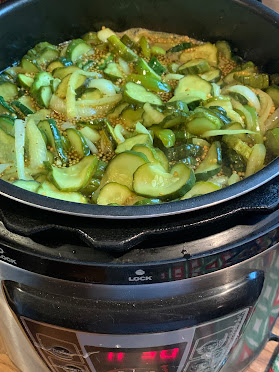
I placed my drained, rinsed cucumber mixture in my large Power Cooker, added the vinegar mixture and let cook until it came to a boil, then boiled 5 minutes.

I carefully ladled the hot pickle mixture into hot pint jars, leaving 1/2-inch headspace. I removed air bubbles by inserting a flat spatula into each jar and slowly moving around the jar edge. Jar rims were wiped clean, sterilized lids added, then sterilized rings secured to "fingertip tight."

I placed each jar into the rack of a water bath canner, lowered it into the simmering water until jars were completely covered with water. I let the water come to a boil and processed for 15 minutes. The canner rack was carefully lifted from canner, jars were gently removed and set aside on a heat-proof surface to cool. I then listen for each jar lid to "ping" (just like I did as a kid!) meaning the lid has sealed to the jar properly.

Yield: about 14 pints


Canning Links:


I hope you'll give this recipe a try, or better yet, grab a girlfriend and make it together!


Friday, December 10, 2021

'tis the season...

 It seems that each passing day raises our anticipation and joy in planning for Christmas...secret surprises, a visit to the tree farm, and a kitchen filled with the aroma of spicy gingersnap cookies. 

Mae, our 1950 oven (why yes, every vintage oven does needs a name!) has been going the extra mile...two ovens, two broilers, 4 burners, and room for a griddle (which I need to find) she warms the kitchen with her magical self. I often think of the past 71 Christmases she's seen...truly, the heart of our kitchen. 

I know your days are filled with busyness...the exciting kind! December is a month filled with cooking, tree-trimming, and singing. Enjoy every minute...the glow of the fire, the twinkling tree, the sound of church bells, the gathering of snowbirds.

Some snapshots of our December, from the old farmhouse...


our tree waiting for decorations

a yellow-ware bowl filled with old-fashioned potpourri

the Hoosier cupboard greets us as we come home

a tree in the window for passersby and woodland creatures

one of my favorite Santas

more of the jolly men on the mantel

such pretty pink clouds (no filter, I promise!)

an old wagon by the lamp post

a special Christmas cactus given to me
by a dear friend when my son was born.
Every year it blooms near his birthday...and while
they usually bloom for only 1-2 weeks, 
last year, it bloomed for 5 months..
.

inspiration...a  handmade sign in a local shop


01 09 10