Welcome to an 1864 farmhouse…life is good!


Showing posts with label beekeeping. Show all posts

Tuesday, July 02, 2013

liquid gold ~ no, no, no...not the furniture polish!


 nature's sweetener...

liquid gold...

the Greeks even called it the nectar of the gods...

Whatever you like to call it, we now have some of our very own...

HONEY, that is!


A trip to the hive (all suited-up of course), and the help of a good neighbor, found us with frames of capped honey ready to be extracted!  Yay!  After our recent swarm, we just weren't quite sure what we'd find on our next hive inspection.

But before we knew it, our handy-dandy honey extractor was whirling around spinning out glorious honey...


When all the frames had been extracted, we opened the gate and watched the honey pour into the sieve, which would filter and catch any wax.


After all the honey was in the pail, we tightened the lid and let it sit for two days to allow the bubbles to rise to the top.
 
And here's a sampling of what we now have in Mason jars just waiting...


to be drizzled over buttery biscuits and thick slices of warm homemade bread. 

It's been an interesting year filled with beekeeping lessons and new experiences, but one taste of this, and it's all worth it!


(Thanks, girls...)  


Friday, May 31, 2013

who would have thought...2 honeybee swarms in one day!


Well, my next post was supposed to show you the whimsical what-not's I'd been creating for our flowerbeds...

but no...it didn't happen, and here's why. 

My beekeeping neighbor found swarm cells during her last hive inspection, and asked our bee mentor to take a look at them with her. I was invited to tag along, which is always great...I'm almost ready to complete my first year of beekeeping, so it's terrific to learn something new.

As I was putting on my bee suit, I received a message that she'd just discovered a swarm...what luck, and with our mentor on the way! It was amazing to see how the swarm was caught and then moved to a new hive. Viola...she instantly has more bees!

Here are a few snapshots of our adventure...

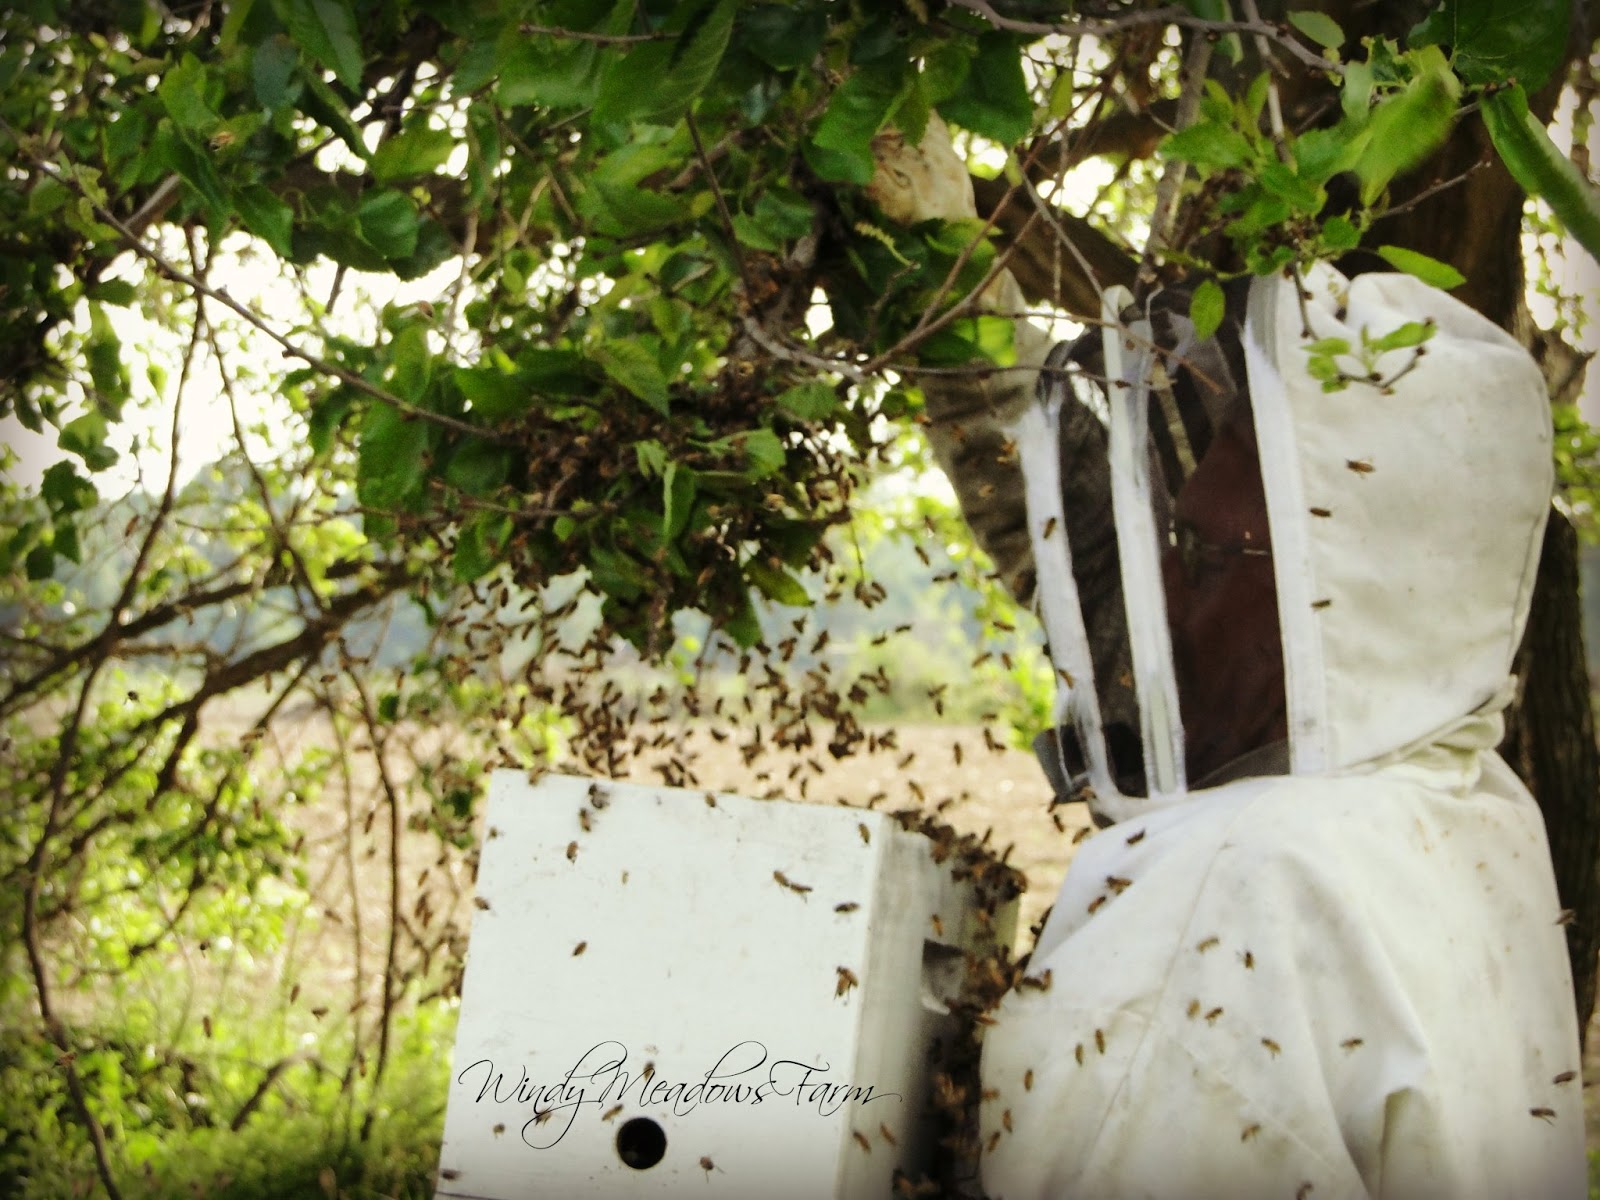
The swarm landed in a nearby evergreen tree.
Once the branch was snipped off, the bees were carried to a nuc box...
and shaken into their temporary home, while a new hive was quickly put together.

Now, about this time, my hubby and Little Man show up at our neighbors' home with the news that they've found a swarm at our house too!


And here's what it looked like...


It was in a tree just a few yards from our hive.
The frames of a nuc box were sprayed with sugar-water.
The swarm was low, so it was decided to shake them into the nuc box...
I love the before & after of this photo and the one above!
And,  as if by magic, they climb into their temporary, new home.

Whew, what a day! 

Now, our neighbor is keeping her swarm...making 4 hives at her home. She sells at the farmers' market each week, along with a few other markets around town.

However; I've decided I'm still learning, and not ready to add a second hive just yet. And although I hate to lose this queen (she has a good temperament making the hive a gentle one), I'll have one of her daughters as a new queen in our first hive.

And so it goes...you just never know what each day will bring!


Wednesday, November 14, 2012

building a hive ventilation box...


The more I learn about beekeeping, the more I love our chickens! 

Just kidding...while I do love the girls and their farm-fresh eggs, they're really pretty low maintenance. This time of year I'm keeping an eye on the temperature in the coop, plugging in the heated waterer on frosty nights, surrounding the coop with straw bales, and adding lots of shavings & straw inside the coop to keep the girls snug for the winter to come.

The bees, on the other hand, have given me much more reason to read...read...read. They too were pretty low maintenance in the summer, but now my goal has shifted from hoping not to get stung, to doing all I can to keep them alive through the winter. 

The bee inspector says they have plenty of honey stores, and that's a good thing...it's the food storage they'll use to survive this coming winter. My mouse guard is in place (evidently hives are considered a cozy winter spot for the field mice!) and now that the temperatures have dropped to the 20's at night, I have straw bales surrounding the hive to screen it from the chilly winds. This weekend I'll wrap the hive in tar paper, replace the bales, then cross my fingers and wait for spring.

There's a break in the weather today, and so I'm putting a ventilation box in place. Our neighbor has one she used successfully last year, and so we patterned ours to be very similar.


The box is used to give any moisture that builds up a way to escape. Filled with fiberglass insulation, it also works to prevent condensation from developing on the underside of the outer cover. If this cold condensation is allowed to form, it drips down on the bee cluster chilling them to the point that they may not survive.


To make the box, start with a spare super that fits your hive. A 1-1/2 inch spade drill bit is used to add holes to the sides of the super...2 on each side.

Each hole is then covered and secured from the inside with #8 hardware cloth. A length of fiberglass screen is stapled across the bottom opening of the box and insulation is added as the final step.

Our neighbor's box has several narrow slats across the bottom; however, she fills her box with sawdust, so the slats work to keep the sawdust in place.  We opted to use fiberglass insulation in our box, and so didn't add the slats.

To install the box, I'll remove the outer and inner covers. The ventilation box will sit directly on the frames of the top hive body. I'll then replace the outer cover (no inner cover needed) then add two bricks to keep the cover in place during the winter winds. Periodically during the winter, if a warm days occurs, I'll quickly peek inside the box to see that it's doing it's job.

And so my learning continues! 

Here's hoping all is well in the hive, and that they've settled down for a long winter's nap...


Wednesday, October 17, 2012

prepping the hive for winter...


Just like everything else on the farm, it's time to prepare for winter. So we're putting the garden to bed, stacking straw bales around the coop, and creating cozy corners for barn cats. It's also time for the beehive to be readied for winter, and this is a new experience for us.

Our bees arrived in July, and so far they've worked hard drawing out foundation and prepping themselves for the season to come. The bee inspector was out last Saturday, and he says we have plenty of honey stores for them to overwinter and that everything in the hive looks just right...yay, that's good news!

So what are we doing to prepare them for winter? Well, here's what we've done so far. Now by no means are we experts, this is, after all, our first beehive. But with endless reading and talking with other beekeepers, we've completed the following...

1~
Keep inspecting the hive to make sure the queen is there or that eggs are easily seen. (our queen is marked, and was easy for us to spot...all is well!)

2~
Continuously check honey supplies for winter (this food storage will keep them alive through the cold months). We have an 8-frame, medium hive, so our hive body consists of 3 boxes. An inspection told us that all frames are filled, but also lifting the hive from behind is a clue to how much food storage the bees have. Having lifted several 50-pound chicken feed sacks, the weight was familiar to me, and the hive was difficult to budge. Again, a good sign that it weighs the 60 to 100 pounds that it should.

3~
Feed the colony a 2:1 sugar-syrup mixture. Following the Beekeeping for Dummies instructions, we boiled 2-1/2 quarts of water, turned off the heat and added 10 pounds of white sugar to the mixture. Stirring until dissolved, I then added 2 tablespoons of Honey B Healthy to the mixture. Last month,
I also added Fumagilin-B to protect them against Nosema. (1 teaspoon in 1/2 c. cold water stir to dissolve, then added to the sugar mixture...this is only added to the first 2 gallons of syrup mixture.)

4~
Monitor the syrup mixture...we'll keep feeding them until they stop taking the syrup or until the daytime temperatures drop into a consistent high only in the 40's.

5~
 I've glued craft sticks/Popsicle sticks to the 4 corners of the inner cover's flat side. This will give the bees ventilation during the winter...it's important to keep the condensation from dripping back on them as ice-cold water.

6~
A metal mouseguard was put in place to allow the bees easy in & out access, but to keep mice
(who are looking for a cozy winter home) outside...where they belong! 


~~~~~~~~~~~~~~~~~~~~~~~~~~~~~~~~~~~~~~~~~~~~~~~~~~~~~~~~~~

So that's our routine for fall. As November approaches, we plan to wrap the hive in black tar paper to help it absorb heat (leaving the entrance open). We'll also stack straw bales or provide another sort of windbreak from the harsh winds, and finally place bricks on the hive cover to keep it in place during those strong winds.

We plan to make a ventilation box to place on top of the hive...an empty super with a screened bottom and several screened ventilation holes drilled in the sides. The box is then filled with sawdust or insulation. More reading up on this is needed, as is the suggestion that we keep the feeder on during the winter. I was told the heat from the hive will keep the syrup mixture from freezing, but my worry is that in opening the hive to refill the feeder, I'll chill the bees.

And so it means there is more reading to do, and much to learn. We've found that there are many opinions from various beekeepers, and many options when it comes to what's "right" in his hobby!  And with that said, I do welcome any beekeeper comments...it's always good to learn what's worked and not worked for you. Your input is appreciated!


Monday, July 16, 2012

bee update...

Our adventures in bee-keeping continue!


I've (kinda/sort-of) mastered the smoker, so I suited up and have taken a peek inside our hive twice since it arrived. Because ours began as a small nuc (only 5 frames of a queen, brood & worker bees), the bees are working hard to fill out the frames in the larger hive. So far these girls are doing a terrific job...they've filled out 16 frames, and I needed to add a third box last week.

While we'll really enjoy our own honey, because our hive was set up in summer instead of spring, our goal isn't to harvest honey, but to make sure the bees have plenty to survive the winter.

We've also needed to provide them with a water source. Our neighbor uses a shallow pan to provide water for her bees, but I've noticed it evaporates very quickly. A little more reading and I found that a chicken waterer is a great way to provide water for bees, so we set one up.


Filling the tray with small rocks gives the bees a spot to land while they drink, and the waterer stays filled for several days.


And so the learning continues...
Happy Monday!

Tuesday, July 10, 2012

a bee-utiful day!


(Okay, it's a corny title...work with me!)


Sunday evening, under the cover of darkness, this was delivered...


Yay, the bees are here! 


And yesterday, with our beekeeping mentor unavailable and beekeeping neighbors on vacation (drat!), I donned my beekeepers suit and dared to step outside alone (resembling the Stay Puft Marshmallow Man, too, I might add) because sugar-water was needed in the hive-top feeder.


There was a lot of activity outside the hive, and the smoker wouldn't smoke well (tips on that problem most welcome) but I did it! The feeder is in and I'll check on their progress tomorrow.


Here's a little peek at what we're enjoying today...


 And so the newest adventure on the farm begins!

Tuesday, June 05, 2012

starting a buzz...

First, a friend gifted me with this lovely tea towel...


then, Little Man gave me some sparkle for my birthday...


and I've been reading, re-reading, and marking up these books for over a year...


and then I thought about it...it was a sign.

No, that's silly, it wasn't a sign...so I hesitated.

I thought about it some more...

did even more reading and talked to beekeeper friends.

I continued to hesitate...for several weeks.
 
Then this morning, brain in a fog from lack of sleep and still bleary eyed, I placed an order for an English Garden Hive (at least I think I did...as I said, lack of sleep was a big factor!)

It will look like this...

photo source: Brushy Mountain Bee Farm

but of course, I have dreams of it (and our yard) looking like this...

photo source: flicker.com ell-r-brown

I'm sure it'll completely transform our entire backyard into an English cottage garden; right?
I'll be asking the kids if they'd like "a spot of tea" (herbal, of course) and calling my mom,
"Mum"...I'm sure of it.


Oh well, a girl can dream...here's to our next big adventure on the farm!

 
01 09 10