Welcome to an 1864 farmhouse…life is good!


Monday, March 04, 2013

artisanal sourdough bread...so easy!

 
I've had a sourdough crock bubbling away on the counter for quite awhile now. Sourdough is one of my favorite breads...crispy on the outside, and chewy on the inside...yum!

So when I came across a no-knead recipe a few weeks ago, I had to try it out. A little reading through the recipe and I found that the dough had to sit and rise s.l.o.w.l.y.  -  12 to 18 hours slowly! Yikes, I almost tucked the recipe away. 

However; by 9 p.m. that night I whipped up the first part of the recipe and by 9 a.m. the next morning I was adding the last touches. This is what came out of the oven by lunchtime...


Absolutely wonderful! Crispy, golden crust...soft and chewy inside, just what I wanted!
Warm out of the oven we topped it with butter and smiled...mmmm. 


So here's the recipe...and really, don't let the time to make it worry you. Just toss it together before bedtime, then finish it up after doing the breakfast dishes. It's perfect pairing with with a bowl of of warm-you-to-your-toes soup!

Artisanal No-Knead Sourdough Bread 

3-1/2 c. all-purpose flour
1/4 t. active dry yeast
1-3/4 t. salt
2/3 c. sourdough starter
1-1/2 c. water
1-1/2 T. cornmeal...for dusting


Whisk together flour, yeast, and salt in a large mixing bowl. Combine starter and water; add to flour mixture. Blend with a rubber spatula until thoroughly combined...mixture will be very sticky and wet.

Cover bowl with plastic wrap; set aside at room temperature for 12 to 18 hours. After at least 12 hours, dough should be dotted with bubbles and have doubled in size.

Turn out dough onto a surface lightly dusted with flour. Dust top of dough lightly with flour, cover with a cotton or linen tea towel, and set aside one to 2 hours.

About 30 minutes before the second rise is complete, place a round or oval 3-1/2 quart cast iron Dutch oven on the middle rack of oven; heat oven to 450 degrees. Once oven has reached desired temperature, carefully remove Dutch oven and sprinkle bottom with one tablespoon cornmeal.

Uncover dough and use a rubber spatula or two plastic dough scrapers, and fold dough over onto itself a few times; shape into a ball. Lift dough and drop into heated Dutch oven; dust lightly with remaining cornmeal. Bake bread, covered, for 35 minutes. Remove lid, rotate Dutch oven, and continue baking an additional 15 minutes, or until bread is golden.


Remove from oven, loosen loaf from Dutch oven and cool on a rack. Makes one loaf.

**You can find this recipe, and lots of other yummy ones, here...
in Grit's new Guide to Homemade Bread.**


Wednesday, February 13, 2013

chocolate fondue...

If you're searching for a Valentine's food gift to share, this fondue is terrific!


Graphics Source


I have a friend who often gifts me with a jar of this yummy fondue, and, I confess, I've been known to share it with my family only after a significant portion of the jar is missing (yes...secretly enjoyed by me.) Then we giggle about why on earth she would give us a jar that's half empty...but my family knows better!

Anyway, don't delay...this is a chocolate lover's dream!

Simply Wonderful Chocolate Fondue


24-oz. semi-sweet chocolate chips
6 T. light corn syrup
3 to 6 T. orange extract
1 pt. heavy cream

Melt chips in a double boiler. Add remaining ingredients; stir until blended and warmed through.

Spoon into a glass jar and tuck into a basket along with pound cake, bananas, mandarin oranges, or strawberries. Give instructions to simply reheat and enjoy. Be sure to refrigerate leftovers...if there are any!


Tuesday, February 12, 2013

homemade crackers...

The temperatures have been swinging back & forth here in the Midwest. Some mornings we wake to find wind frosting the windowpanes and whistling through the tall pines. Single-digit nights mean bundling up for outdoor chores and moving a bit quicker than usual to get back inside the old farmhouse.

Only a few days later, we discover Mother Nature has warmed up enough for the bees in our hive to take a quick flight around after a long winter's nap. Even the girls are happy to stretch their legs outside of the coop and enjoy a bit of a breeze. A breeze that teases of springtime.

Today is somewhere in between...it's 30 degrees and yesterday's icy winds from the high-wind warning have slowed. Still, it's chilly enough for me to think a steaming bowl of soup should be on the menu for tonight's supper.

We almost always have both a loaf of warm bread and crackers on the table when it's soup-time (and maybe even a yummy grilled cheese sandwich!) Recently, a friend shared this recipe for homemade crackers. To my surprise delight, they take practically no time at all to make & bake!

Heart shapes for Valentine's Day!


Quick & Easy Homemade Crackers

1-1/2 c. all-purpose flour
1-1/2 t. cream of tartar
1 t. salt
3/4 t. baking soda
1/4 c. oil
1/2 c. water
1 egg, beaten
2 T. water
2 t. sugar

Sift together flour, cream of tartar, salt, and baking soda. Slowly add oil, stirring until mixture resembles crumbs. Stir in water, then continue to blend until a soft dough forms. Place dough on a lightly-floured surface and roll to 1/8-inch thickness. Whisk together egg, water, and sugar; brush over dough. Cut out crackers using cookie cutters. Place crackers on a lightly-oiled baking sheet. Bake at 350 degrees for 15 minutes, or until crackers are golden. 

Amount of crackers depends on thickness of dough and size of cookie cutter.
Sometimes I sprinkle dried garlic and dried, minced onion over the dough right after brushing it with the egg mixture...but you can use anything that's a favorite. Try dill, rosemary, sesame seeds, or coarse salt.


So the next time you're in the mood for soup, try making some of your very own homemade crackers...they're oh-so good!

Monday, February 04, 2013

2 to 4 more inches...

A bit more snow in the forecast for today. Inside, it's warm & cozy with a Dutch oven of chili simmering on the stove and the aroma homemade bread baking.

However; outside, it's a bit different...


The beeskep in the herb garden is covered with snow.


 And look hard...can you see the cheery note Sweet Girl left on the chicken run?

(I Heart Chickens!)


But soon enough, we'll be hearing a friendly buzz in the garden...


and watching the first butterflies flit across the yard.


"When the snow is still blowing against the window-pane
in January & February, and the wild winds are howling without,

what pleasure it is to plan for summer that is to be."

-Celia Thaxter


So what are you doing on this winter's day?
Dreaming of spring?

Making Valentines?
Knitting by the fire?
Or maybe you're hauling firewood & filling feeders!


Whatever it might be, let your heart be light!


Monday, January 28, 2013

simple country pleasures...

Love those girls and their farm-fresh eggs...and finding this tiny one made me smile!


 Kitty on the coop...Tinkerbell getting a bird's-eye-view on a snowy day.


"I'm ready for my close-up..." Azreal, oh-so sweet & affectionate.


"Don't forget me!" A profile of Midnight...who can always be found twirling around our feet.


Hope it's warm where you are...school is out here today due to icy roads & freezing rain. 


Days like this call for homemade cocoa & doughnuts, a crackling fire, jammies, and a day of movie-watching...I'm off! 


Happy Monday!

Wednesday, January 23, 2013

snowy days of quiet beauty...

January on the farm....
temperatures plummet and we turn our heads away
from bone-chilling blasts of wind.

However; there is still beauty to be found...


“Winter is the time for comfort,
for good food and warmth,
for the touch of a friendly hand and for a talk beside the fire:
it is the time for home.”

― Edith Sitwell

Thursday, January 10, 2013

hear that fiddle music?


"Ashokan Farewell" has been, for us, one of the most beautiful, haunting songs we've ever heard. If by chance you're unfamiliar with it, it's from the PBS series Civil War by Ken Burns. Take a minute and click above to hear it playing in the background while the Sullivan Ballou letter is read...I can't express how touching the letter & music are together.

For many years I've wanted to play the fiddle and this song was at the top of my list. But, alas, with kids on the move, a farm to keep up, church callings, and family & friends, it's just one of those things that sat on the back burner...until this past Christmas!

Just look what my family surprised me with!


yes, I've broken a string already...
yes, I'm screeching like a beginner...
and yes, I may get my family matching earplugs...

but with the help of this book...how can I fail?


Old-Time Fiddle for the Complete Ignoramus by Wayne Erbsen

(Don't you love that title?!)

While I'm working my way through the book, it'll most likely be quite a long while before I'm playing "Ashokan Farewell"...but I'm on my way.

And so, to leave you with a smile...

What's the difference between a violin & a fiddle?
Well...a violin has strings, a fiddle has straaangs!


Tuesday, January 01, 2013

happy new year!

Now that's a snowman! 


Happy New Year, and may it be a blessed 2013 for you.

Thursday, December 27, 2012

Christmas cheer...

Holiday homecomings and gifts from the heart have certainly taken the chill out
of the winter winds.


Nearly 8 inches of snow fell in our part of the Midwest yesterday, which made staying at home the best option! With heads bowed against the sleet and icy air, we hurried to complete our outdoor errands, then brushed the snow from our boots and coats, ready to settle back inside.

However; it seems the kids don't feel the wintry chill at all. They had no trouble bundling up, going sledding, and tossing snowballs! Eventually they came back in, rosy-cheeked and smiling, ready for some hot chocolate.

And so, while winter is here, and we are lucky enough to have the magic of a country Christmas, here are a few glimpses of the farm under the spell of a winter snowfall.


Home is truly the heart of the holidays...

Monday, December 24, 2012

merry Christmas!


"As the Christmas season envelopes us with all its glory,
may we, as did the Wise Men, see a bright, particular star to guide us
to our Christmas opportunity in service of our fellowmen.

May we all make the journey to Bethlehem in spirit,
taking with us a tender, caring heart as our gift to the Savior."

~Thomas S. Monson, 1994

Saturday, December 22, 2012

an early Christmas present...

I know everyone is so busy...I'll keep this short. I received an early Christmas present and just had to share. 

A while ago my mom passed along a catalog from Americana Floorcloths (find them by clicking hereand told me to choose one for my birthday...yay!  

Oh my...the catalog is filled with lovely floorcloths in a variety of designs and colors. There were so many patterns I fell in love with, but an especially pretty red floorcloth kept catching my eye. It was my dream farm...sheep, dairy cattle, pretty red saltbox on a hill...ahhh. 

And so I placed an order...Jennifer Frantz, the artist, was terrific as we emailed back & forth with my questions and her answers. 


Now, her artwork is in our kitchen, just in time for Christmas...it looks so pretty. I love the idea that it's made by hand, just for me. And with winter's first snowfall, a crackling fire while we bake cookies, and kids who just couldn't be more excited, I'm a pretty happy gal!

Friday, December 14, 2012

a little candelight...

This vintage-style Santa has greeted us each time we come through our
kitchen door for several years.


And last week, I decided he needed a little candlelight to warm him up on these cold winter evenings. Sure enough, I spotted just what I needed wanted in the window of a little primitive shop on the town square...a green vintage jar with a little tealight tucked inside sweetly sitting on a bent piece of silverware.

However; practicality got the best of me...I knew I could make it myself, and even better, I knew I had everything I needed already at home!

I bent a silver spoon (you can try stainless steel, but I don't possess the brute strength to bend it...old silver is so much easier!) A bend at the bottom of the handle creates a flat spot for the tealight to rest, and a curve along the top secures it to the lip of the jar.


A bit of coarse salt was added to the jar, along with "greenery" & a rusty tin star...I was done in no time at all!


Sweet & simple...that's just how I like it!


Monday, December 10, 2012

Advent jar...

Shops around the town square are readying for Christmas. Windows are now filled a rich blend of both traditional and vintage trees. Some trees boast cheery red bows, snowbirds, and sparkly lights while others are hot pink, flocked white, or vintage silver...each bringing back sweet memories in their own way.

Temperatures the last few days were in the 60's and rainy...not exactly the type of weather that brings Christmas cheer. However, one night the rain stopped, the temperatures fell and I woke up to find the truck doors had frozen closed. Luckily, with a little effort, I was able to open the passenger's side door and climb over to the driver's side. Soon the truck was warm and ready to take kids to school. And so it goes...December is a month of surprises indeed...not the least of which, is what weather we'll wake up to.

Like so many we have familiar traditions...a movie basket filled with old favorites, an Advent calendar with pockets hiding a daily chocolate treat, and a stack of well-loved books filled with Christmas stories and poems. Each night we settle in before bedtime to read from a lovely hand-made Advent calendar shared by a dear friend.

This year I wanted to add a little something new to our holiday traditions. Often with the hustle & bustle of the season...school parties, get-togethers with friends, concerts, & church gatherings, simple family time can get lost in the shuffle. So keeping the idea simple, I jotted down 24 ideas of things to do together. They range from playing a board game to building a gingerbread barn, making "real" hot chocolate and popping corn the old-fashioned way.  
Tucked inside a vintage green jar, one slip is pulled out each day to see what the surprise is in store for us.


Time flies...and I'm hoping to create some fond remembrances for our family. As the saying goes, "We're never too young or too old to store up memories."

Please share some of the traditions you enjoyed growing up, or what you've done to celebrate Christmas as a family. I'm sure you'll inspire new ideas for us!


Thursday, November 29, 2012

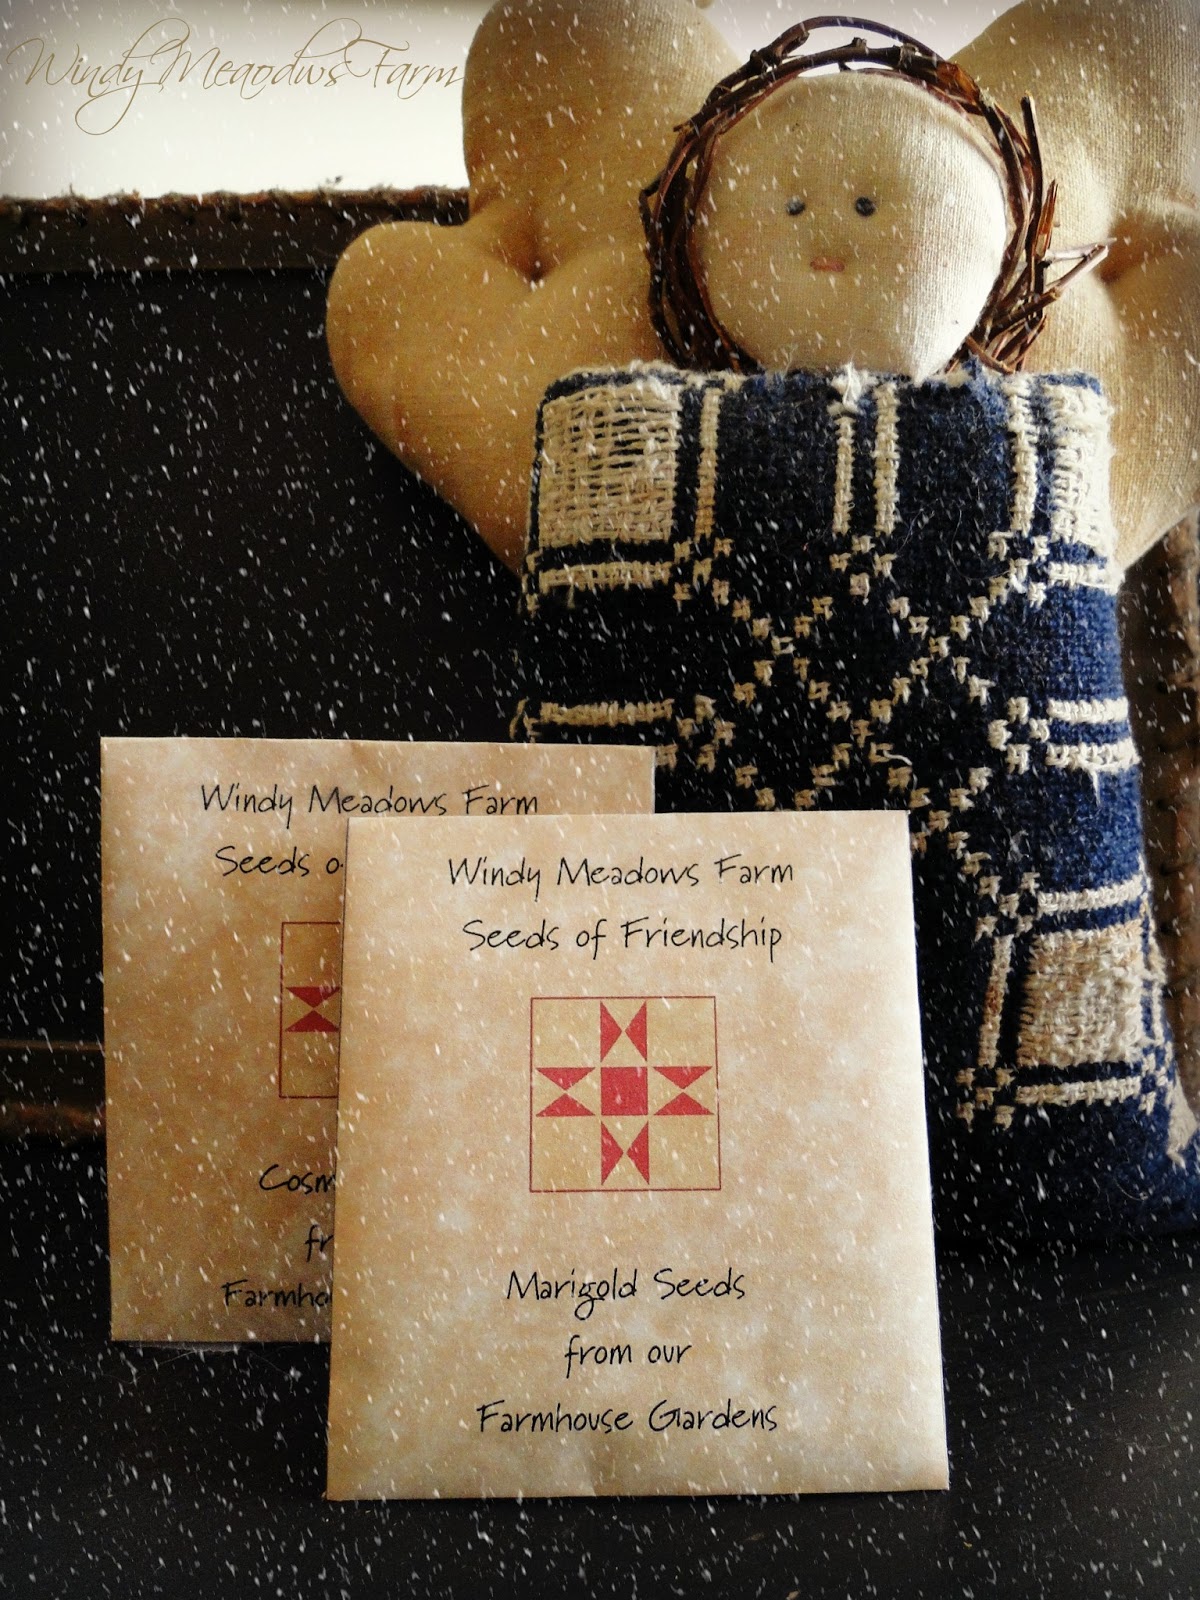
seed packets to share...

Very good friends of ours are moving away...it's a sad time when folks that we've come to know well, and enjoy their company so much, have to leave. We understand though... sometimes there's just a pull, a tug, a feeling of inspiration that it's time to settle somewhere else, a new place to call home.

Before they left, I wanted to share something with them that would bring back memories of their years spent here, so I decided to send along seeds for a Friendship Garden.


There are lots of seed packet templates online, so it makes this a quick & easy project. Simply find a design you like (or create your own), then fold on the dotted lines, glue flaps in place, and fill with flower seeds from your garden. It's that simple and in no time at all, you will have oodles of packets for sharing!

I'd encourage you to create some seed packets from the flowers in your own garden. Tuck them into Christmas cards or a "thinking of you" letter...they're sure to bring smiles to a special friend who's far away.

While it's a simple gift, I hope when Ellen scatters these seeds in the garden of her new home, she'll think of us and have warm memories of her time spent in Midwest.  Oh how we'll miss this family!

Wednesday, November 14, 2012

building a hive ventilation box...


The more I learn about beekeeping, the more I love our chickens! 

Just kidding...while I do love the girls and their farm-fresh eggs, they're really pretty low maintenance. This time of year I'm keeping an eye on the temperature in the coop, plugging in the heated waterer on frosty nights, surrounding the coop with straw bales, and adding lots of shavings & straw inside the coop to keep the girls snug for the winter to come.

The bees, on the other hand, have given me much more reason to read...read...read. They too were pretty low maintenance in the summer, but now my goal has shifted from hoping not to get stung, to doing all I can to keep them alive through the winter. 

The bee inspector says they have plenty of honey stores, and that's a good thing...it's the food storage they'll use to survive this coming winter. My mouse guard is in place (evidently hives are considered a cozy winter spot for the field mice!) and now that the temperatures have dropped to the 20's at night, I have straw bales surrounding the hive to screen it from the chilly winds. This weekend I'll wrap the hive in tar paper, replace the bales, then cross my fingers and wait for spring.

There's a break in the weather today, and so I'm putting a ventilation box in place. Our neighbor has one she used successfully last year, and so we patterned ours to be very similar.


The box is used to give any moisture that builds up a way to escape. Filled with fiberglass insulation, it also works to prevent condensation from developing on the underside of the outer cover. If this cold condensation is allowed to form, it drips down on the bee cluster chilling them to the point that they may not survive.


To make the box, start with a spare super that fits your hive. A 1-1/2 inch spade drill bit is used to add holes to the sides of the super...2 on each side.

Each hole is then covered and secured from the inside with #8 hardware cloth. A length of fiberglass screen is stapled across the bottom opening of the box and insulation is added as the final step.

Our neighbor's box has several narrow slats across the bottom; however, she fills her box with sawdust, so the slats work to keep the sawdust in place.  We opted to use fiberglass insulation in our box, and so didn't add the slats.

To install the box, I'll remove the outer and inner covers. The ventilation box will sit directly on the frames of the top hive body. I'll then replace the outer cover (no inner cover needed) then add two bricks to keep the cover in place during the winter winds. Periodically during the winter, if a warm days occurs, I'll quickly peek inside the box to see that it's doing it's job.

And so my learning continues! 

Here's hoping all is well in the hive, and that they've settled down for a long winter's nap...


Thursday, November 01, 2012

practical preparedness...firewood

Photo Credit...

I obviously don't exercise enough.

After stacking wood with my family this weekend...
My back and shoulders ache.
I'm feeling old.
It's time for the heating pad.


However, on the bright side, we have a terrific amount of firewood ready at a moment's notice should it be needed! 

The barn is filled with the sweet scent of freshly-cut wood as the aromas of cherry, hedge, and ash mingle to greet us each time we step inside. And while it's a delight to take in, on the more practical side, it has a very important role to play in our preparedness.

Should we have a power outage, this wood will not only keep us warm, but will help to feed us as well. Living in a farmhouse that's 148 years old has blessed us with 3 fireplaces...one each in the kitchen, dining room, and what was most likely once a parlor. 

Those fireplaces most certainly kept the original homeowners warm from many a winter storm. However, somewhere along the years, a previous owner decided it was a good idea remove the chimney of the fireplace in the dining room, and toss it down the flue passageway. Sadly we couldn't rebuild the structure to make it safely usable, however, we did have the firebox reworked and then refinished an old mantel to keep the home's original look.

Now, how to store that firewood to make sure it's ready when we need it...

1~
Choose where you store the wood carefully. Find a spot that's dry and allows for air to circulate around the woodpile. A barn or an open-ended wood shed are both ideal. Wet wood will rot, crumble, and give off very little heat. It's essential to keep the wood dry.

2~
Remember to stack the wood off the ground. Wood pallets work well, or you can easily put together a log rack you'll find available at your home improvement store. (I say "easily" because I didn't put it together...hats off to my hubby on this one!) Look closely at the wording on each log rack box...it will tell you how much wood the rack support. Most come ready to hold 1/2, 3/4 or 1 cord of wood. It's important not to overload the rack.

3~
If you choose to place the log rack outdoors on the ground, instead of on a cement pad, stake the rack to keep it steady. If that pile begins to lean, eventually the entire log rack will come with it.

4~
If the woodpile it outside and no barn/shed is available, be sure to cover it with a tarp to keep it dry, and secure the tarp from the winter winds. If you happen to get a sunny winter day, you may want to even uncover the wood to let out any moisture that's trapped inside.

5~
While wood is generally sold by the cord (4'x4'x8') how do you know how much wood you'll need? Well, that depends on many factors. How many hours a day do you need a fire? Are you cooking in a large fireplace or on a small wood stove? Is it your only source of heat/cooking, or are you also using coal, wood pellets, canned heat, or kerosene?  Here is an excellent site that gives not only information on heating options, but also essential safety tips to keep in mind.

I've read that Montana pioneers needed 12 cords of wood to make it through a winter. However; that was a 24-hour a day fire for warmth and cooking, with winter lasting often from October through April. And while most of us wouldn't need anywhere near that amount, it would be wise to do the math and find out how much wood would sustain your family through a hard winter.

6~
How long will your wood last? Well, the experts say indefinitely if you keep it dry and the air can freely circulate around the woodpile. I have to agree. Last year we finished burning several logs tucked into a corner of our barn that were at least 10 years old!

Yes, a crackling fire on a Sunday afternoon is a favorite around this old house. Good for curling up beside with a good book, some knitting, or even a little nap. But knowing that we're prepared for the winds to blow and the snow to fly, also gives peace of mind.


Monday, October 22, 2012

thanks, Capper's Farmer!


A heartfelt "Thanks!" to the publishers of Capper's Farmer for including me in their first-ever Winter 2012 holiday bookazine!


Filled to the brim with handmade gift ideas, yummy recipes, and inspiration for old-fashioned holidays, I'm tickled the publishers of GRIT magazine invited me to join them in this issue.

If you flip through the bookazine to page 12, you'll find the story of how we roast a turkey in our 1860-tin kitchen (reflector oven). It's oh-so easy, and has a delicious, truly roasted flavor. And...roasting it this way frees up the oven for all those Thanksgiving rolls and pies!

You can find out more about the bookazine by clicking here, or if you subscribe to GRIT Country digitally, you'll see it there as well.

A happy, happy Monday...thanks again GRIT & Capper's!


Wednesday, October 17, 2012

prepping the hive for winter...


Just like everything else on the farm, it's time to prepare for winter. So we're putting the garden to bed, stacking straw bales around the coop, and creating cozy corners for barn cats. It's also time for the beehive to be readied for winter, and this is a new experience for us.

Our bees arrived in July, and so far they've worked hard drawing out foundation and prepping themselves for the season to come. The bee inspector was out last Saturday, and he says we have plenty of honey stores for them to overwinter and that everything in the hive looks just right...yay, that's good news!

So what are we doing to prepare them for winter? Well, here's what we've done so far. Now by no means are we experts, this is, after all, our first beehive. But with endless reading and talking with other beekeepers, we've completed the following...

1~
Keep inspecting the hive to make sure the queen is there or that eggs are easily seen. (our queen is marked, and was easy for us to spot...all is well!)

2~
Continuously check honey supplies for winter (this food storage will keep them alive through the cold months). We have an 8-frame, medium hive, so our hive body consists of 3 boxes. An inspection told us that all frames are filled, but also lifting the hive from behind is a clue to how much food storage the bees have. Having lifted several 50-pound chicken feed sacks, the weight was familiar to me, and the hive was difficult to budge. Again, a good sign that it weighs the 60 to 100 pounds that it should.

3~
Feed the colony a 2:1 sugar-syrup mixture. Following the Beekeeping for Dummies instructions, we boiled 2-1/2 quarts of water, turned off the heat and added 10 pounds of white sugar to the mixture. Stirring until dissolved, I then added 2 tablespoons of Honey B Healthy to the mixture. Last month,
I also added Fumagilin-B to protect them against Nosema. (1 teaspoon in 1/2 c. cold water stir to dissolve, then added to the sugar mixture...this is only added to the first 2 gallons of syrup mixture.)

4~
Monitor the syrup mixture...we'll keep feeding them until they stop taking the syrup or until the daytime temperatures drop into a consistent high only in the 40's.

5~
 I've glued craft sticks/Popsicle sticks to the 4 corners of the inner cover's flat side. This will give the bees ventilation during the winter...it's important to keep the condensation from dripping back on them as ice-cold water.

6~
A metal mouseguard was put in place to allow the bees easy in & out access, but to keep mice
(who are looking for a cozy winter home) outside...where they belong! 


~~~~~~~~~~~~~~~~~~~~~~~~~~~~~~~~~~~~~~~~~~~~~~~~~~~~~~~~~~

So that's our routine for fall. As November approaches, we plan to wrap the hive in black tar paper to help it absorb heat (leaving the entrance open). We'll also stack straw bales or provide another sort of windbreak from the harsh winds, and finally place bricks on the hive cover to keep it in place during those strong winds.

We plan to make a ventilation box to place on top of the hive...an empty super with a screened bottom and several screened ventilation holes drilled in the sides. The box is then filled with sawdust or insulation. More reading up on this is needed, as is the suggestion that we keep the feeder on during the winter. I was told the heat from the hive will keep the syrup mixture from freezing, but my worry is that in opening the hive to refill the feeder, I'll chill the bees.

And so it means there is more reading to do, and much to learn. We've found that there are many opinions from various beekeepers, and many options when it comes to what's "right" in his hobby!  And with that said, I do welcome any beekeeper comments...it's always good to learn what's worked and not worked for you. Your input is appreciated!


01 09 10